Recently I finished a cool electronics project: internet connected lights under my bed. In five steps I will guide you from project to project, each time adding functionality to what we made. In the second part we will put a small computer in our circuit, so we are able to display any color we want to have.
After week 1 you were probably wondering why you could only choose 3 colours, and how you might be able to dim the lights. Dimming the light can be seen as quickly pressing the on/off button. If you press faster: more light will come out, if you press slowly: less light will come out. Our sensor only has the “on” and “off” press, so we will have to add something that regulates how fast lights are pressed.
For this project we will use a “Node MCU”: http://www.nodemcu.com/index_en.html . You can see it as a small programmable computer that you can connect to the internet over Wi-fi. Programming it is easy using the Arduino environment(which can be downloaded here: https://www.arduino.cc/en/Main/Software). How to set this up can be found on this webpage: http://www.instructables.com/id/Quick-Start-to-Nodemcu-ESP8266-on-Arduino-IDE/ . After you set up the environment we will start by creating a simple program that does the pressing for us.
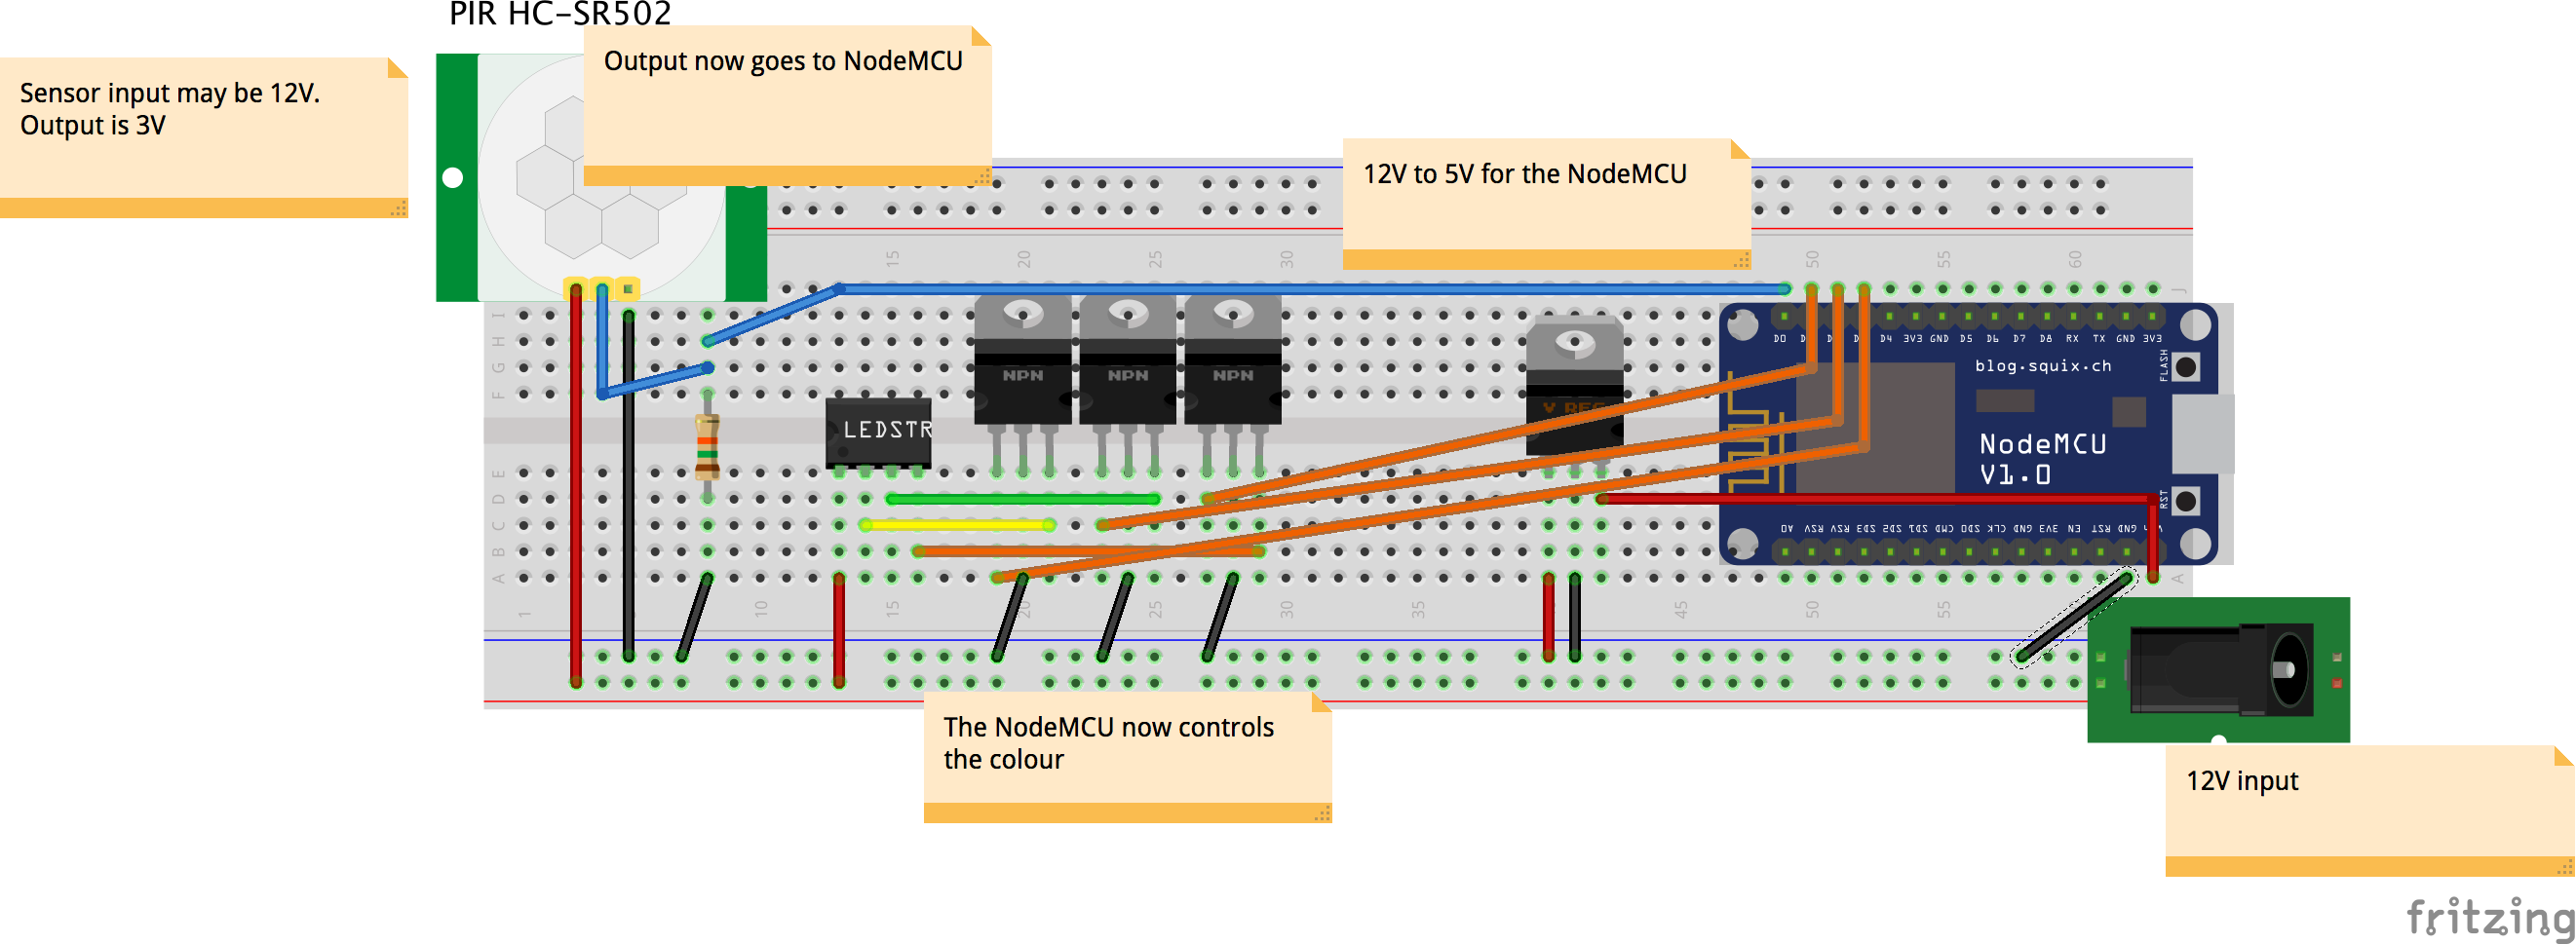
If you look at the NodeMCU it has many pins. What the General Purpose Input Output (GPIO) number is of each pin can be found on this image: https://pradeepsinghblog.files.wordpress.com/2016/04/nodemcu_pins.png?w=616. In your code you set one pin to input (the one you connect the motion sensor to), and three pins to output (the ones that control the colors). If you would simply connect the output of the sensor to the NodeMCU you could get a randomly fluctuating voltage, that is why you need a pull down resistor (see https://en.wikipedia.org/wiki/Pull-up_resistor).
The complete new diagram we build looks like this:
Next up: the code to control the LED’s, and a way to set the color over the internet. I already wrote some code that does this. Please read through the code, and replace the SSID and password to match your own wifi.
If you put this code on your NodeMCU you can open the serial monitor to see the IP of your device. In my case this is 192.168.1.17. If you type this number in your browser you should see “Hello from my intelligent bed” in your browser. If you navigate to YOURIP/setstate?state=0 the lights should turn on.
What’s next? Well, there are currently three things we like to fix:
- Setting the mode and colors in a browser is terribly user-unfriendly. In part 3 we will make an app that lets you set the colors!
- The internet of things kind of dictates that we should at least let something know that we are walking past our bed. We will do this in part 4.
- The bed is called “smart”, but the only thing it does is react to you. Let’s change this and react to the weather outside. We will do this in part 5.
I hope you enjoyed tinkering with the components! If you have any questions, or a cool result: send me a message!
Facebook Comments (
G+ Comments ()