Recently I finished a cool electronics project: internet connected lights under my bed. In five steps I will guide you from project to project, each time adding functionality to what we made. In the first two parts we tinkered with hardware and now have an internet connected device! This time we will create a user friendly interface: an Android app.
Creating a simple app is ridiculously easy nowadays. Every simple app I create is done using the MIT App inventor found here: ai2.appinventor.mit.edu/. The layout of your app is created by dragging and dropping components, and the logic is created by putting “puzzle pieces” together.
As you “code” by dragging and dropping components, sharing this “code” is difficult to do. Therefore I will show what I made, how I made it, and why I made it that way.
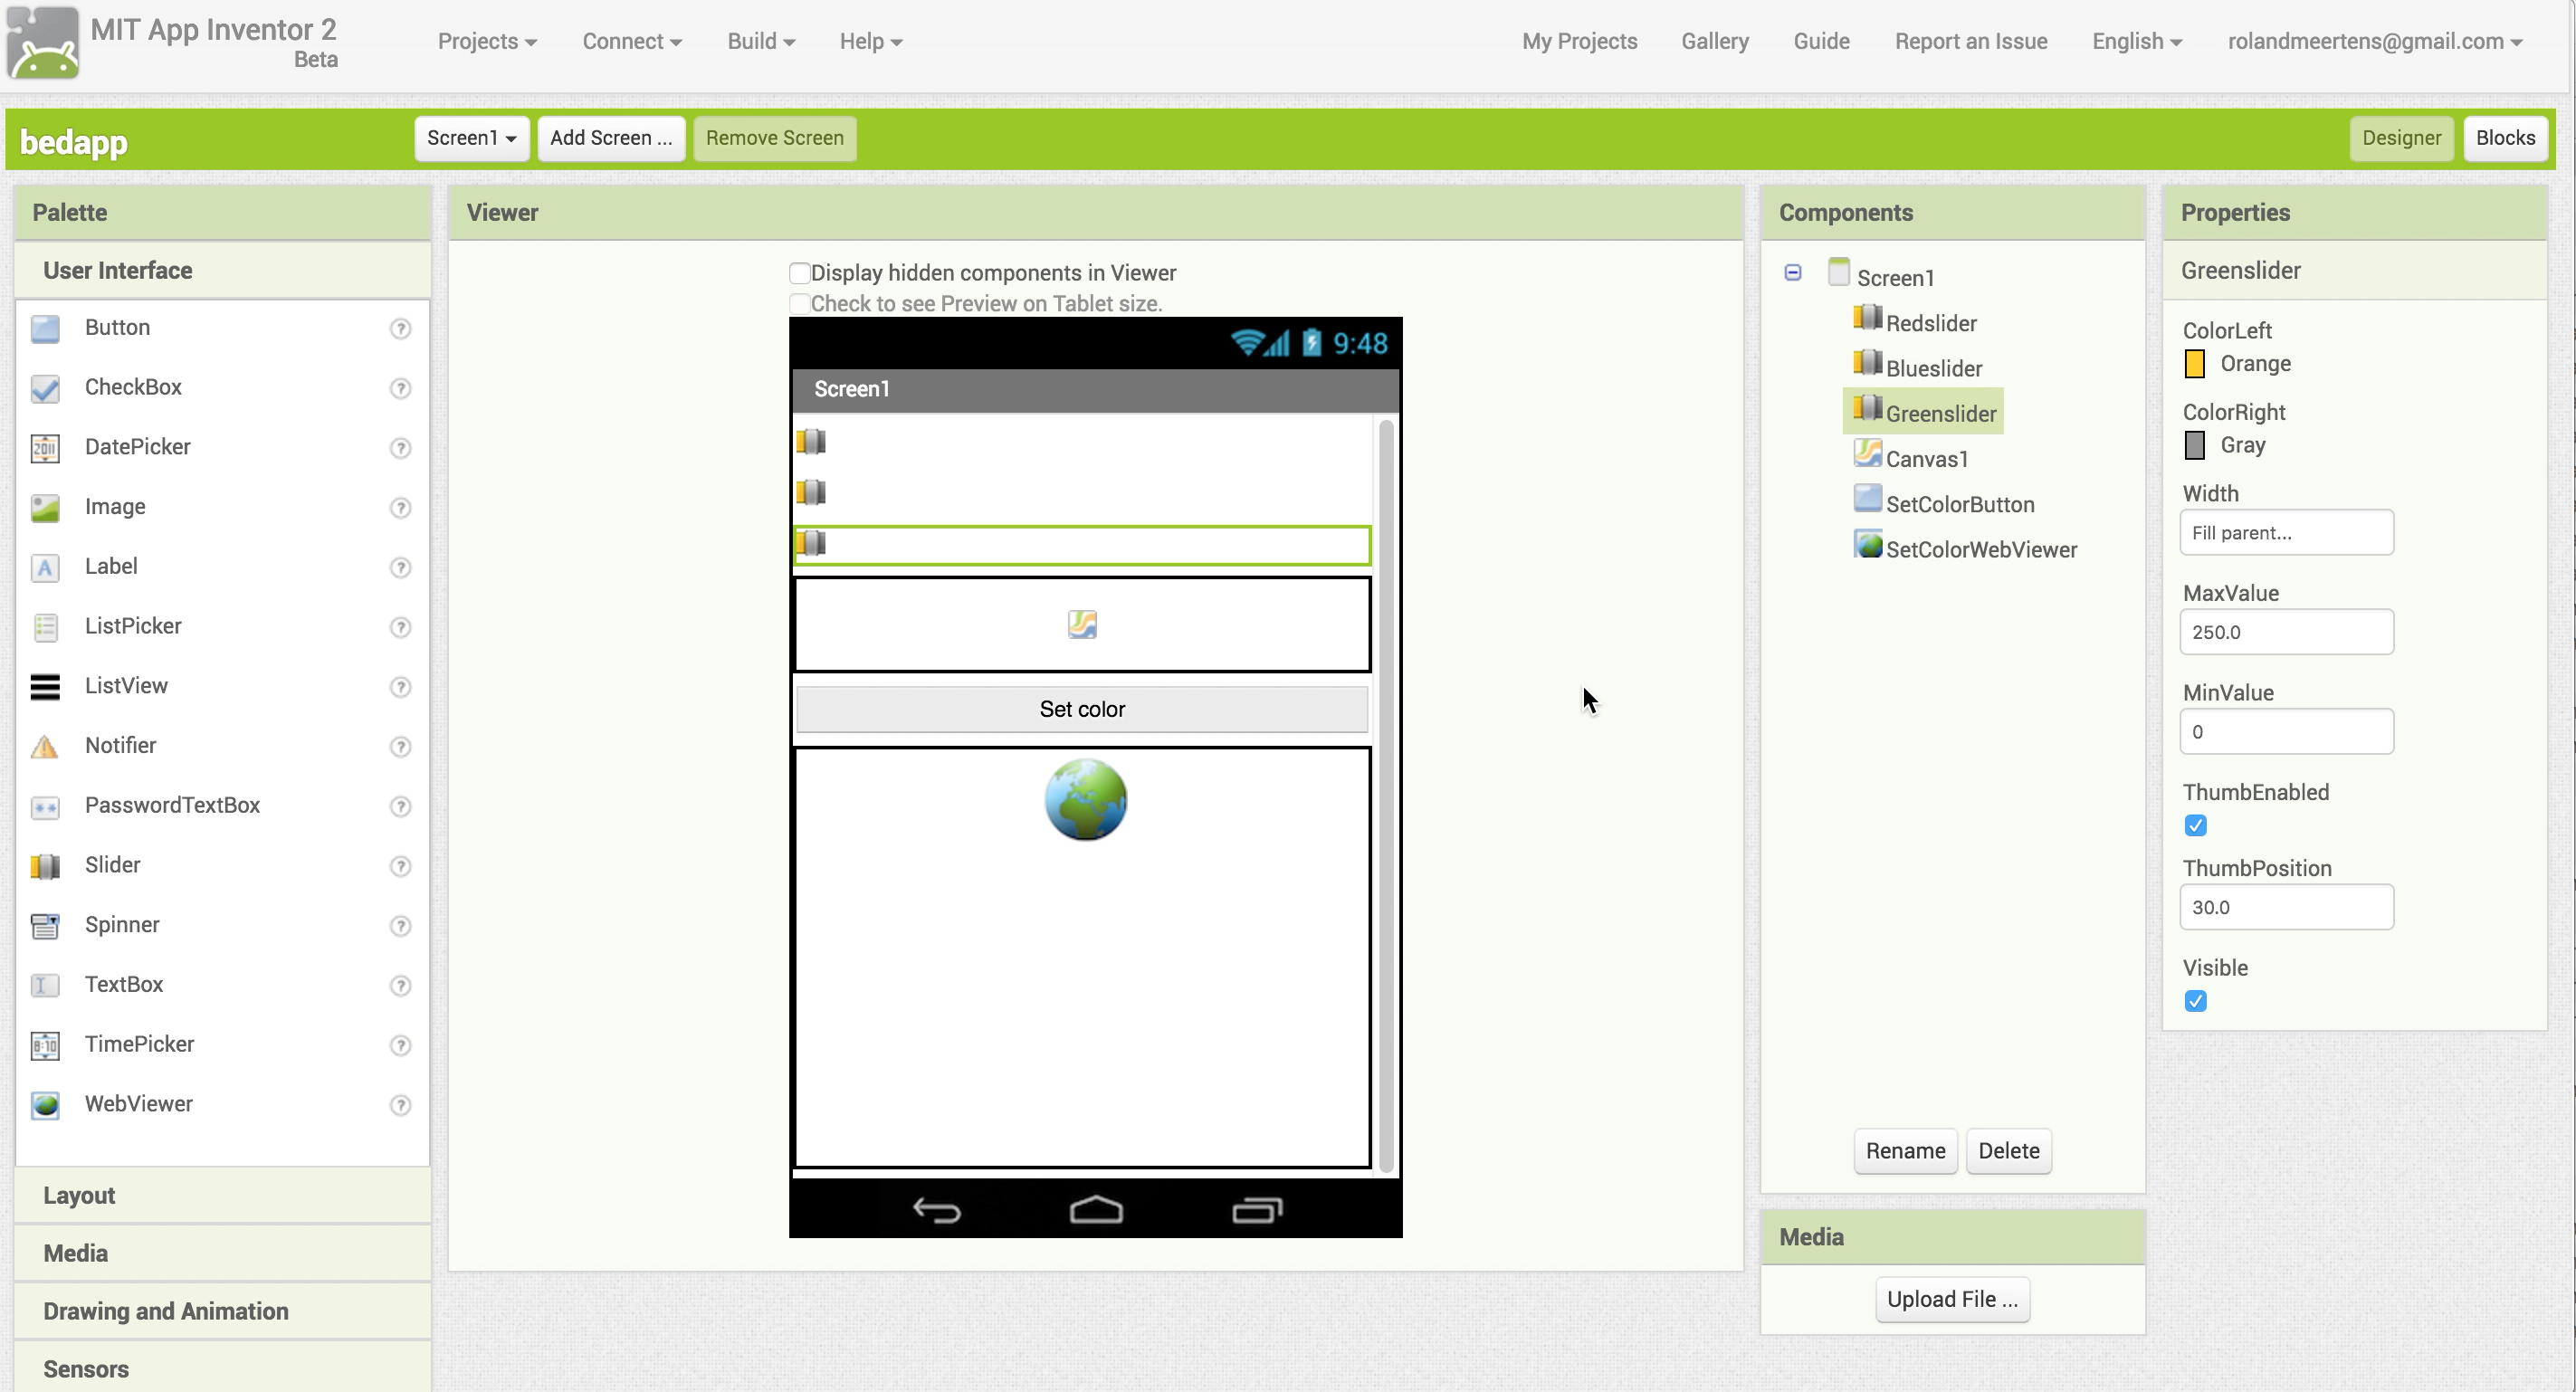
Start off by dragging the following things in your screen:
- Three sliders (red, green, and blue) which we use to select a colour. Make sure that their MinValue is 0, and their MaxValue is 250.
- A canvas that will display the color we selected with the sliders
- A button that, when pushed, will set the lights on our device
- A WebViewer. This component is necessary to go to a URL, just like we did in our browser in the previous part of the tutorial.
I made the width of all components equal to “Fill parent..” to look good on my phone.
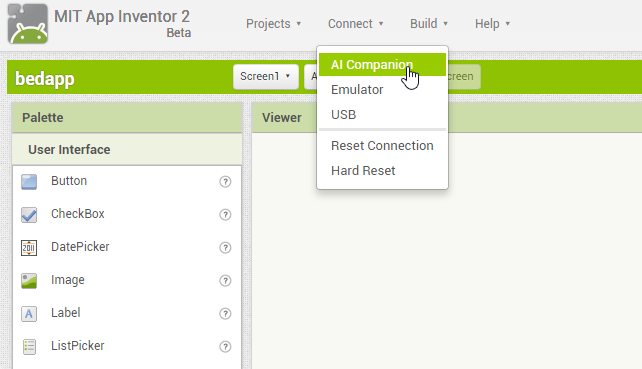
Speaking about phones: the best thing about the App Inventor is the possibility to immediately test your app on your phone using the companion app. Download it from the App store: https://play.google.com/store/apps/details?id=edu.mit.appinventor.aicompanion3&hl=nl .
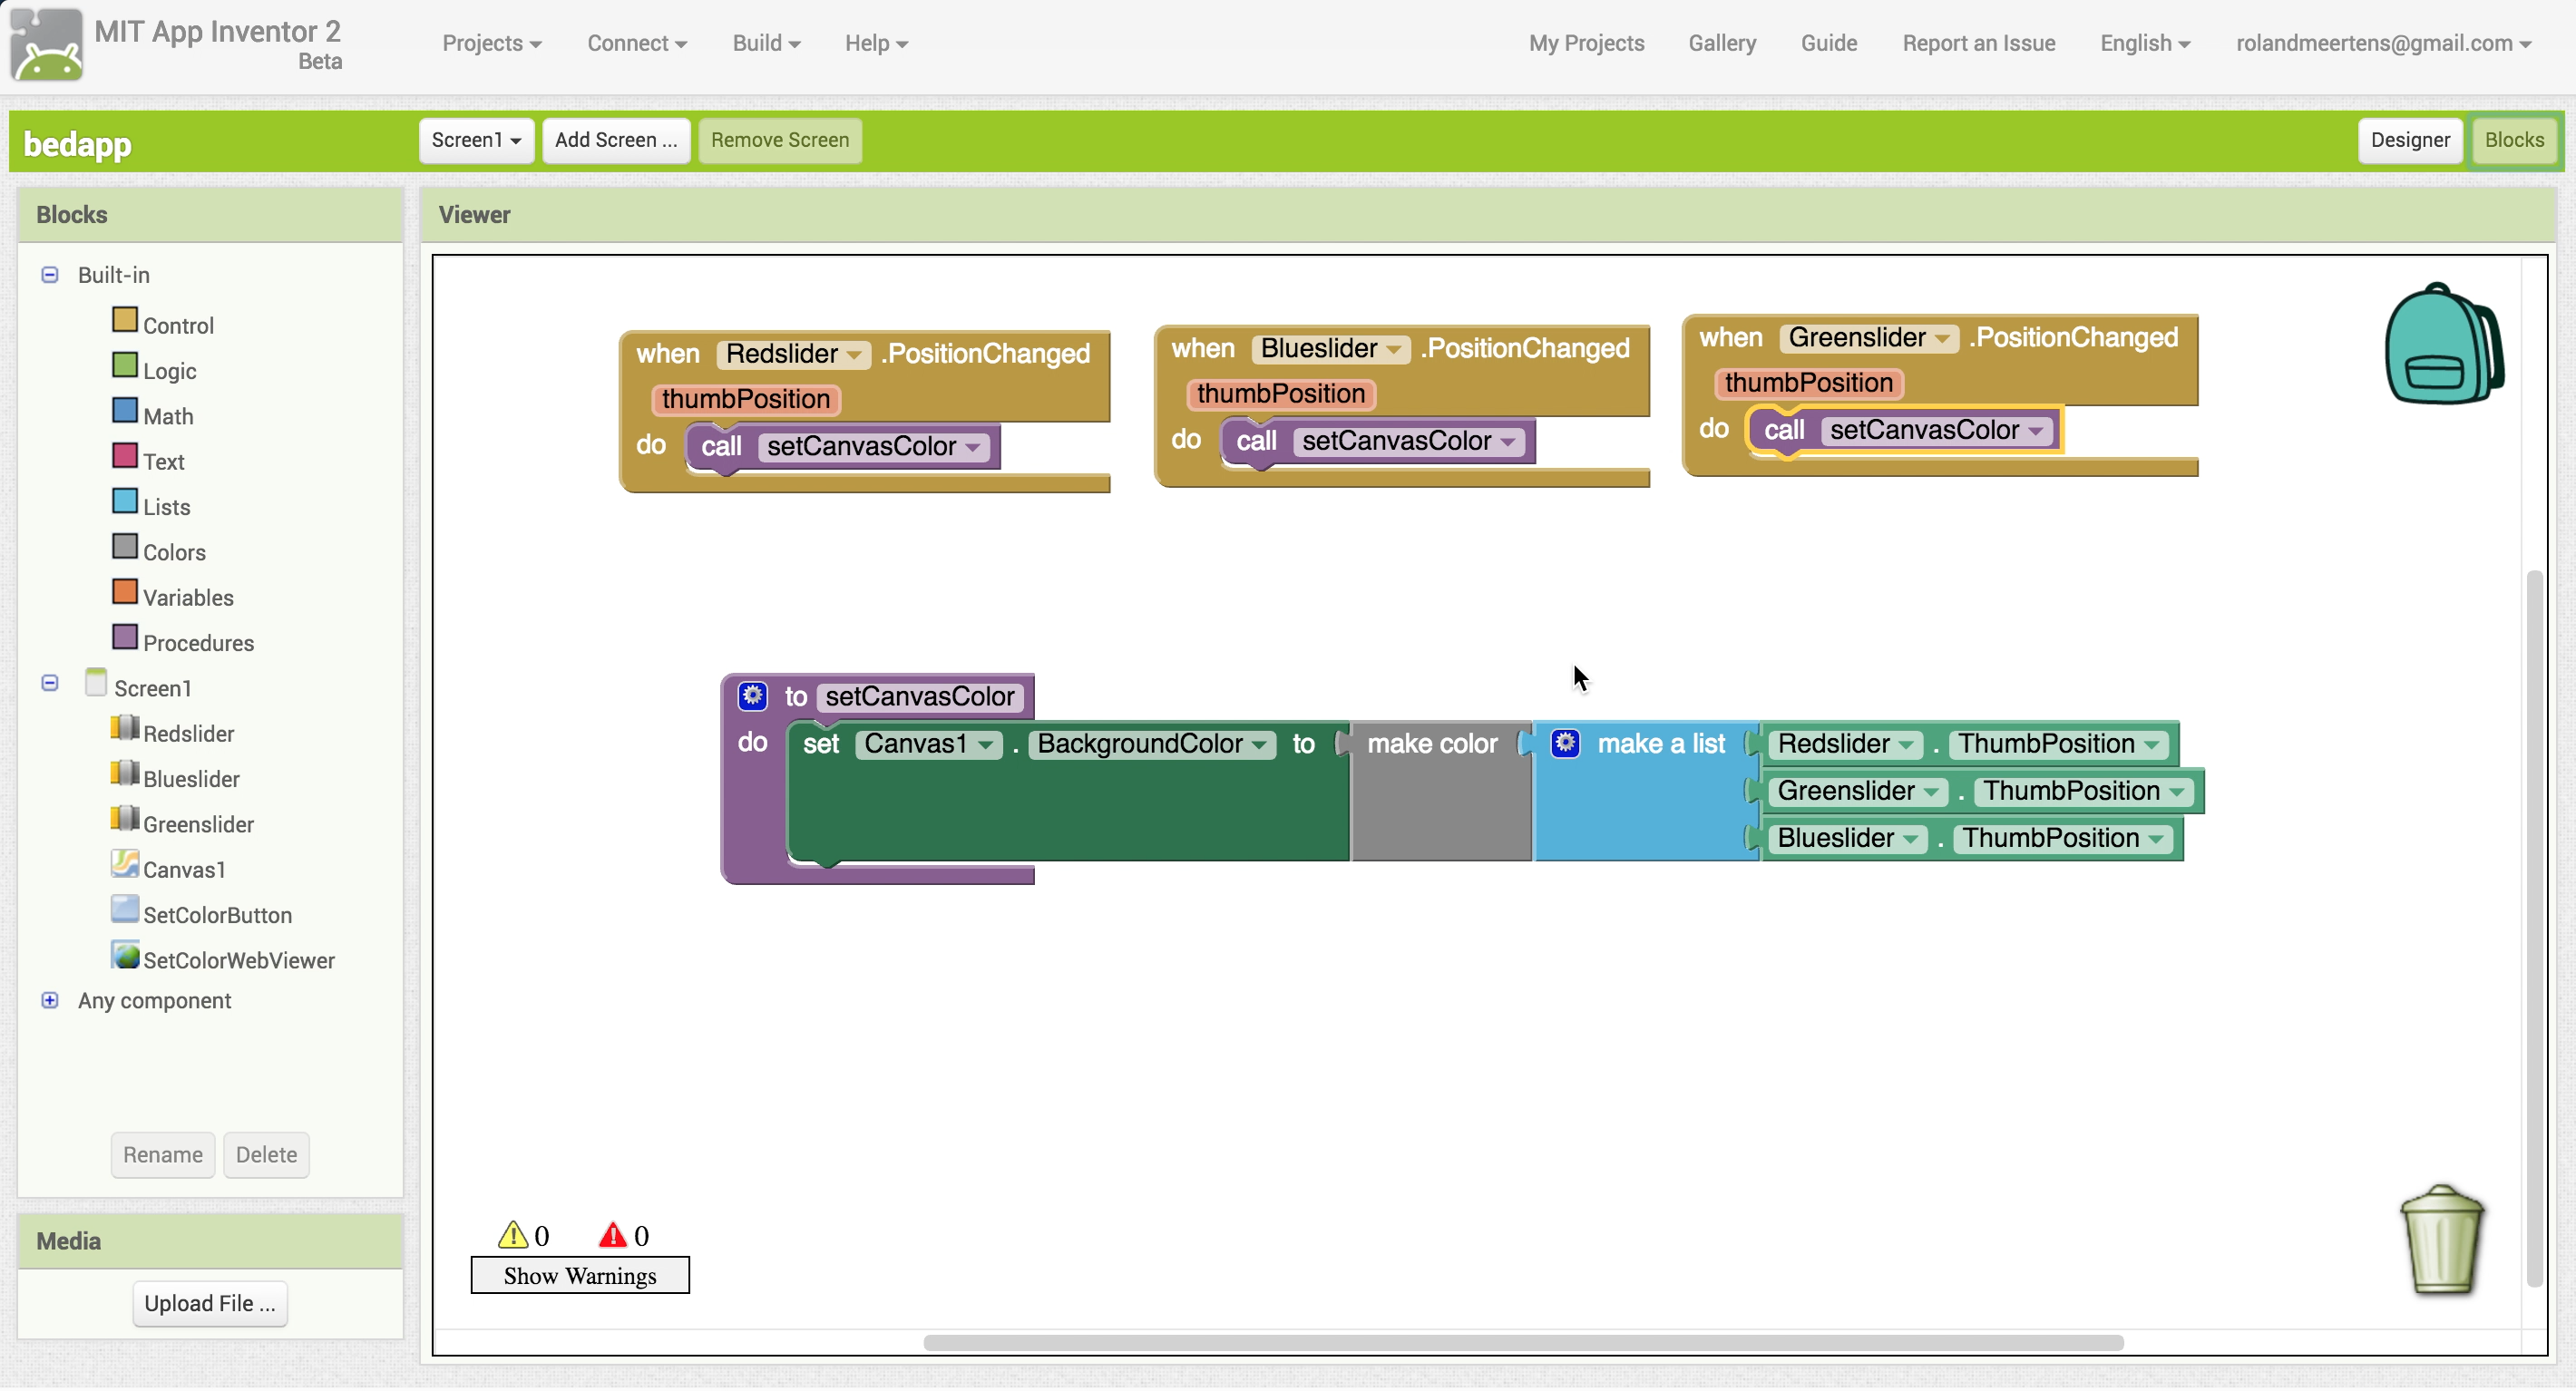
Next we will first create the color preview option. In your designer screen you added a canvas. This canvas has the option to set a background color, making it perfectly usable as a color previewer.
Although you can select many colors with the built-in functions, we want to preview the color we selected with the red, green, and blue slider. This can be done using the block “make color”.
After you create the procedure (or, function) “setCanvasColor” you call this one every time the position of the sliders changed. This will update your canvas continuously making it easy to select a color.
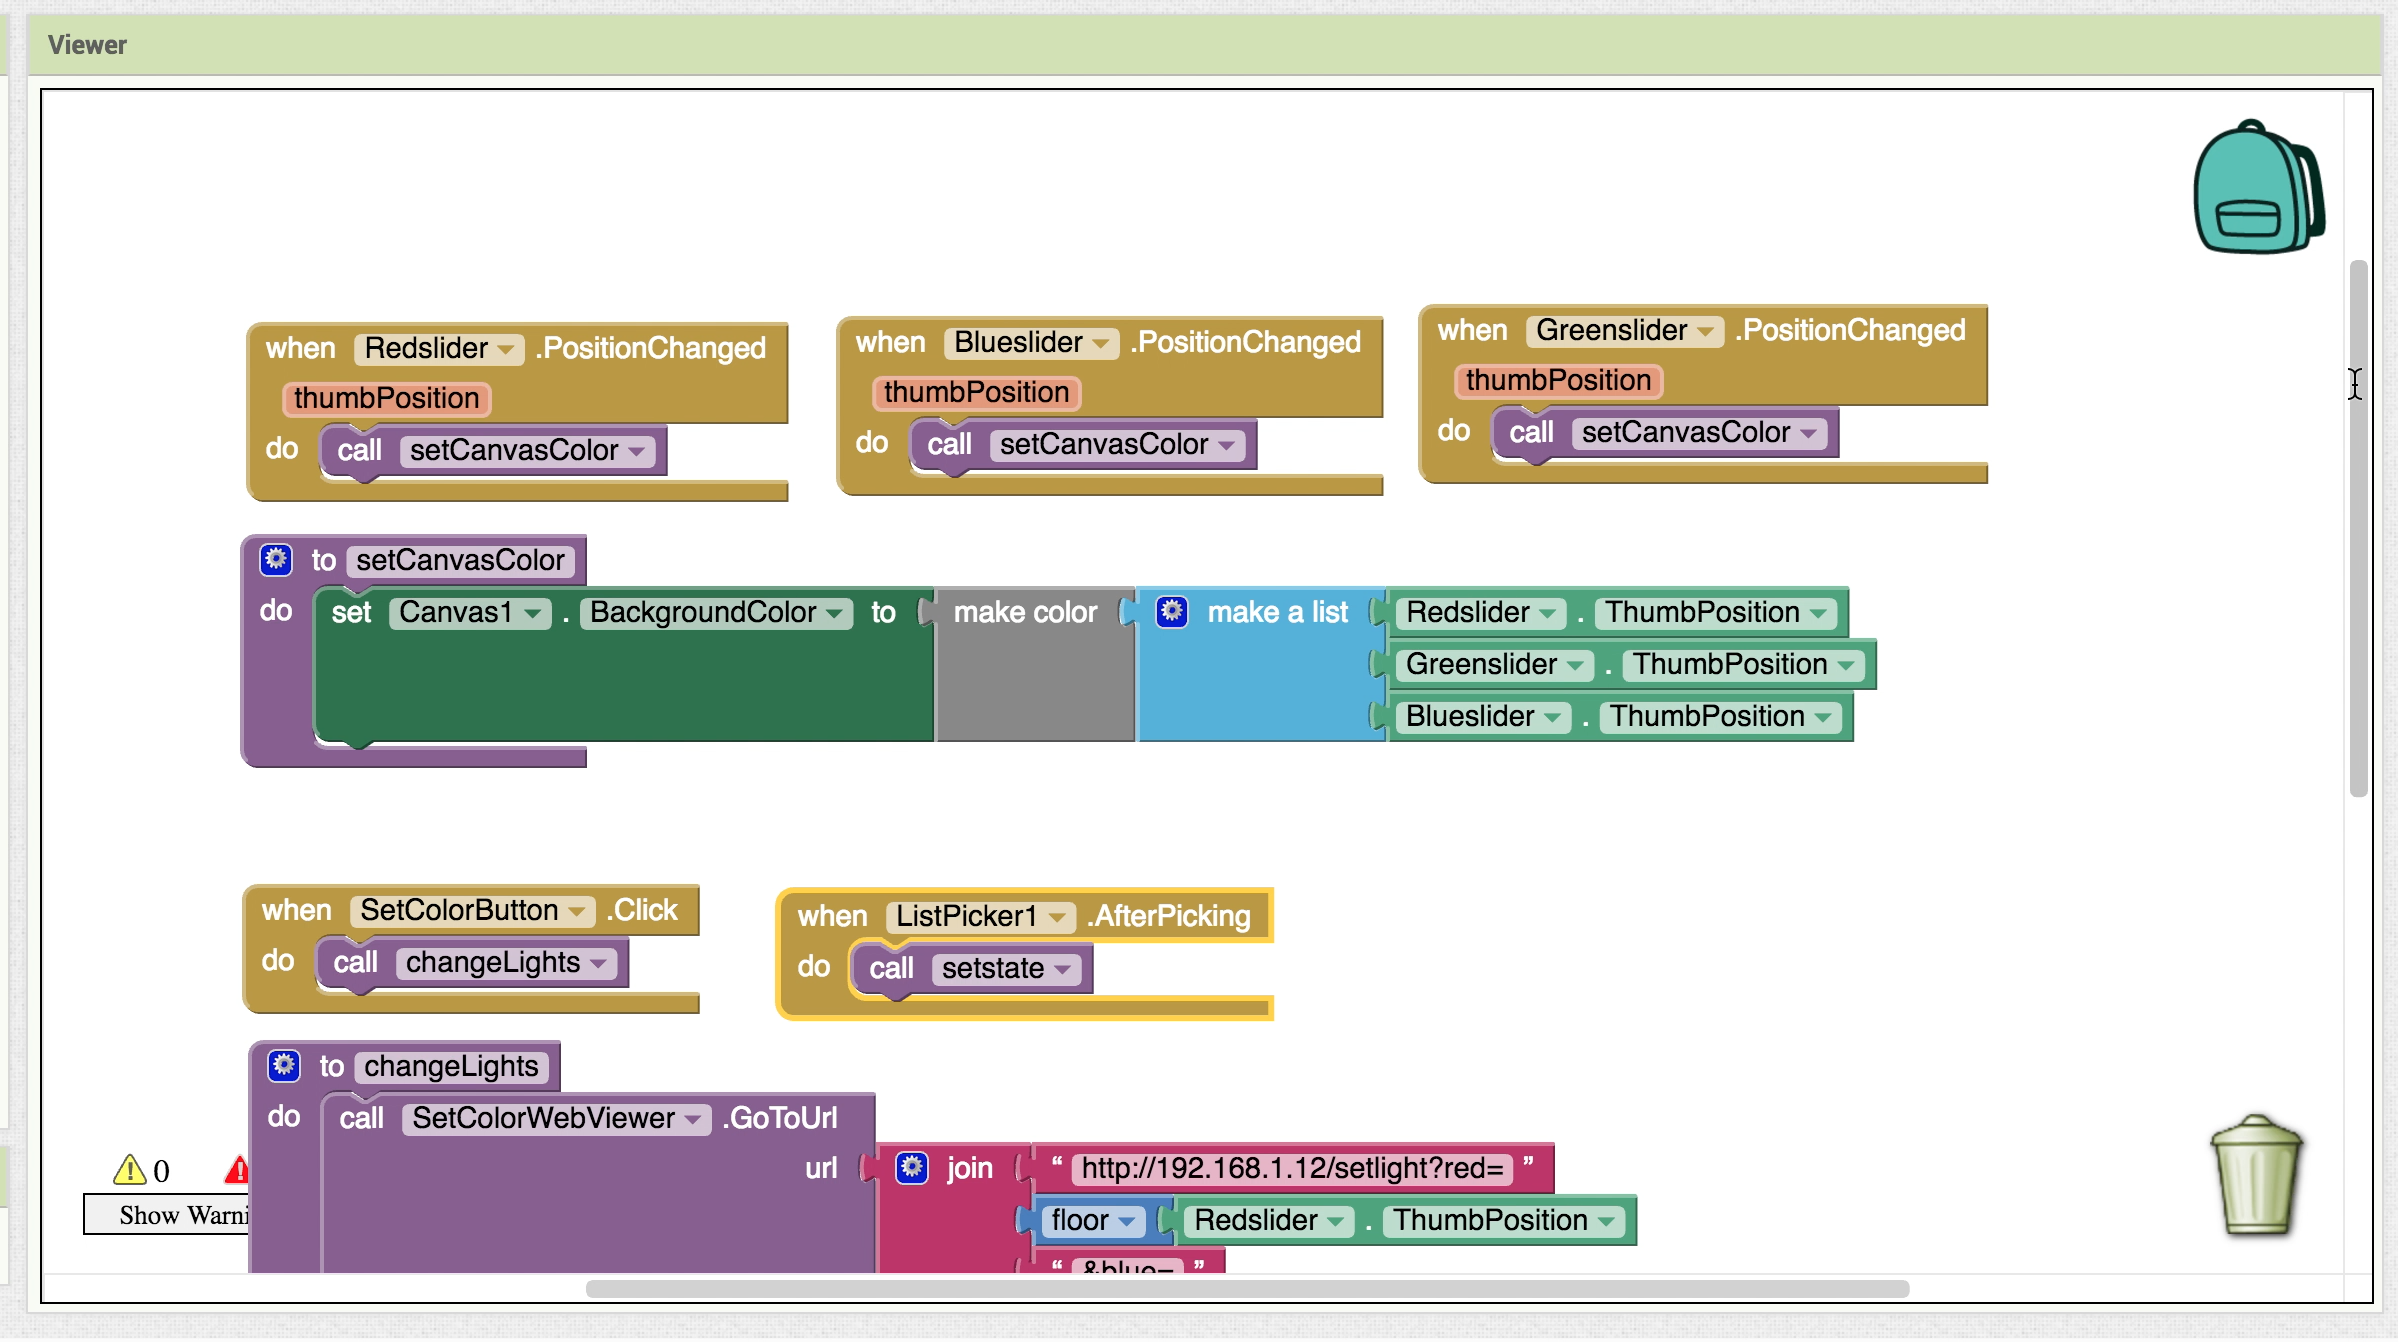
Note that changing the color of the bed at the same time would probably be a bad idea: moving the slider from 0 to 250 would cause a lot of data packages sent to our device. That’s why we added the “SetColorButton” to our interface. After this button is clicked we will go to the URL of our device with the WebViewer. How I coded this can be seen in this image:
Try our your self-made app and enjoy the fact that you just made a nice interface with your bed!
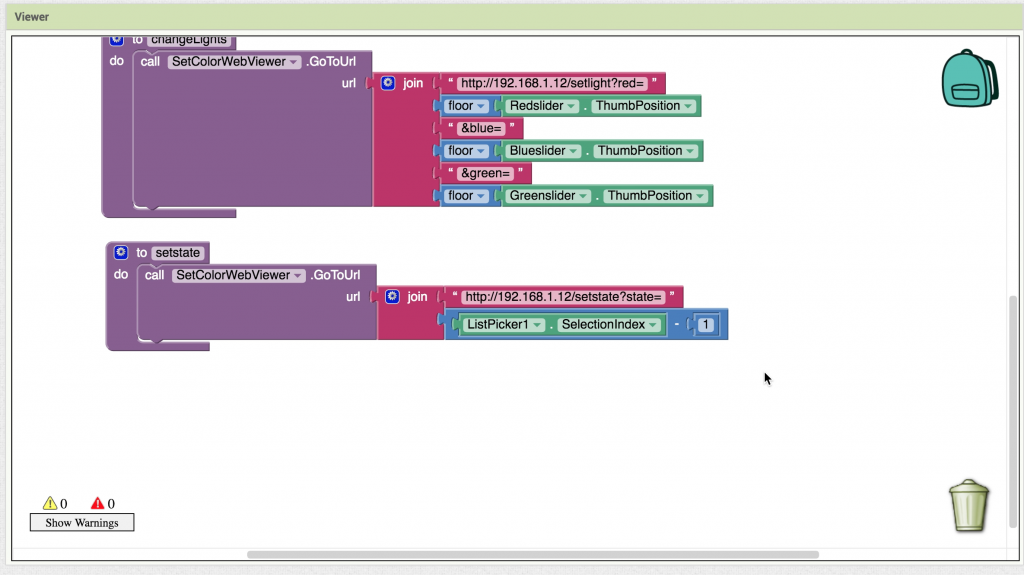
You might remember that we had 3 different modes: on, off, and motion detected. You can adjust your app to be able to set these with a “ListPicker”, an element that when clicked gives the user the choice between several items. What these items are can be selected with the “ElementsFromString” option.
The set state function works like the set color function: you navigate to a certain URL using the WebViewer. Note that the listpicker outputs numbers 1,2,3, and we expect the number 0,1,2. This means we have to substract one from the selectionIndex before sending it to our device. The final program looks like this:
Hopefully you enjoyed building your own app with the MIT App inventor. If you have any questions, feel free to leave a comment!
![]()
Facebook Comments (
G+ Comments ()