Today I discovered a great thing for people with two computers (development and training). In my case, my normal work-pc is a mediocre Windows computer (company policy) that can’t handle deep learning. My learning-pc with GPU does not have a screen, and is accessed remote through a tool like Putty. This leaves you as a python programmer with three choices: use a tool to sync your files, develop without an IDE, or… set up your server as a remote in the Pycharm IDE.
Setting up your server is easy, once you know how. It can be done when starting a new project. First of all: make you you have the “professional” edition of Pycharm. The community edition does NOT support this feature.
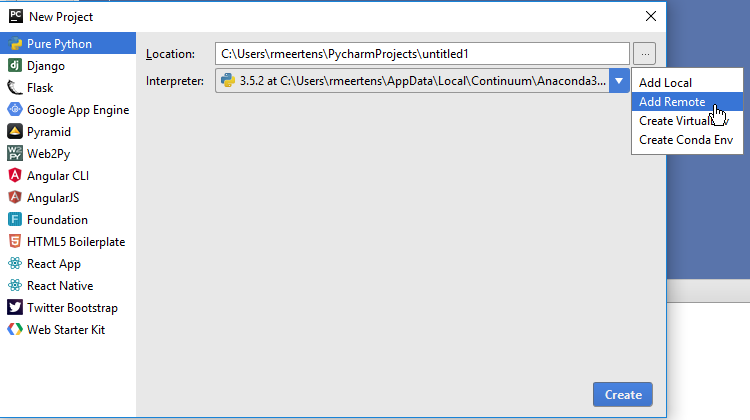
When you create a new project you can select your interpreter. On the right is a button which, when clicked, allows you to add a remote. Click this button.
Give the remote a name and select how you want to put your files on the remote. As my learning pc has SSH enabled I selected SFTP.
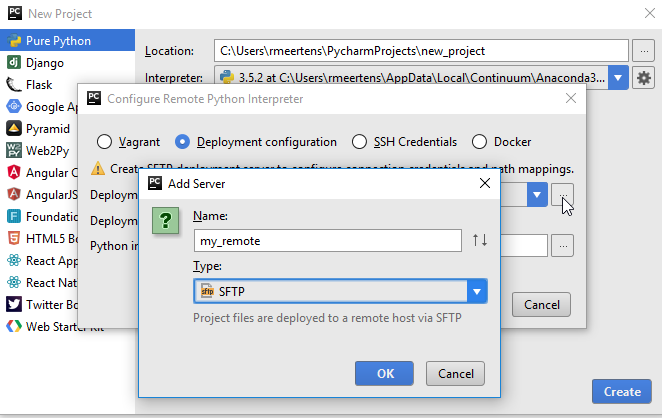
Next up: adding the details of your server. You can either login with your username and password, or select that you want to log in with an SSH key.

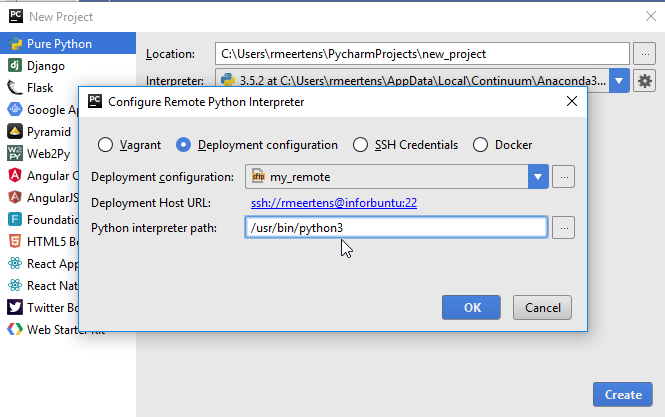
After you did this select your remote in the Deployment configuration, and select where your interpreter path is. In my case I installed Tensorflow for Python 3, and thus had to enter /usr/bin/python3.
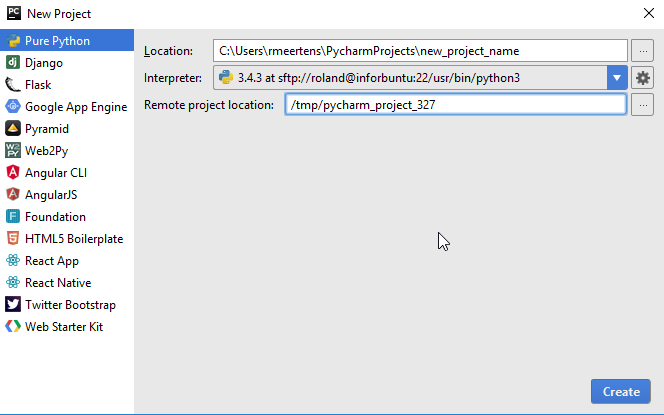
By default Pycharm creates a new folder for your project in the /tmp/ folder. This can be a bit of a pain if you are (often) restarting your remote computer, and/or have to download a lot of data each time you do so. If you want you can change it to your own workspace folder.
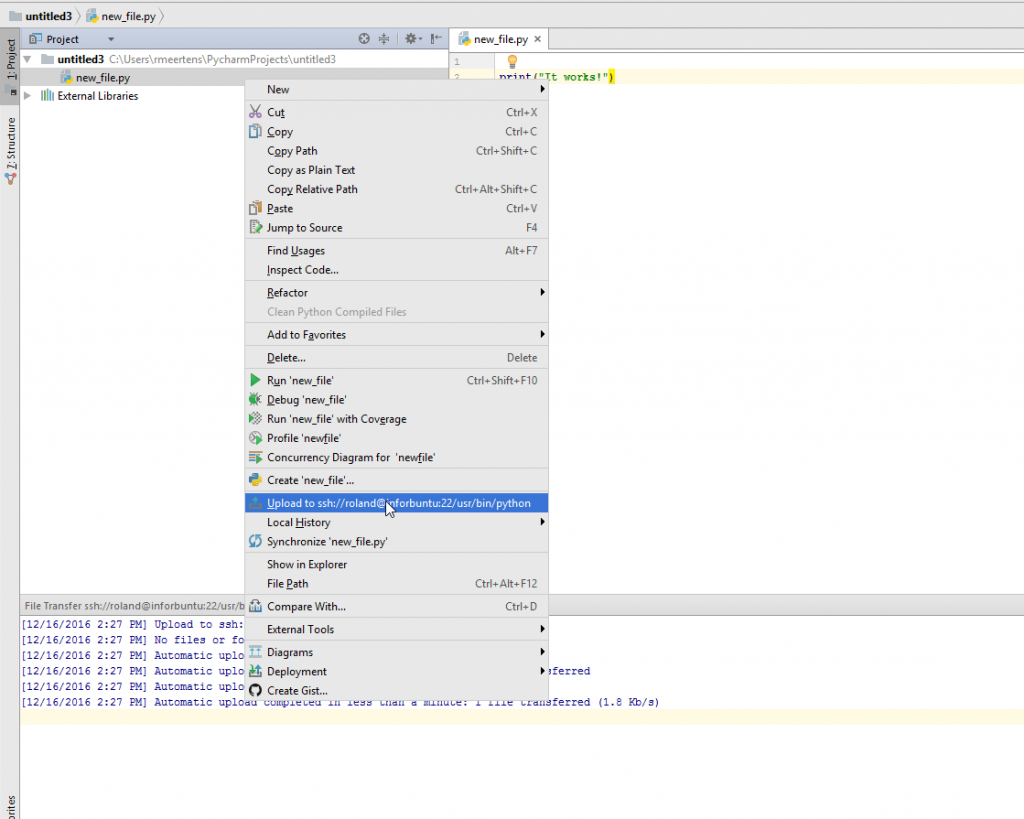
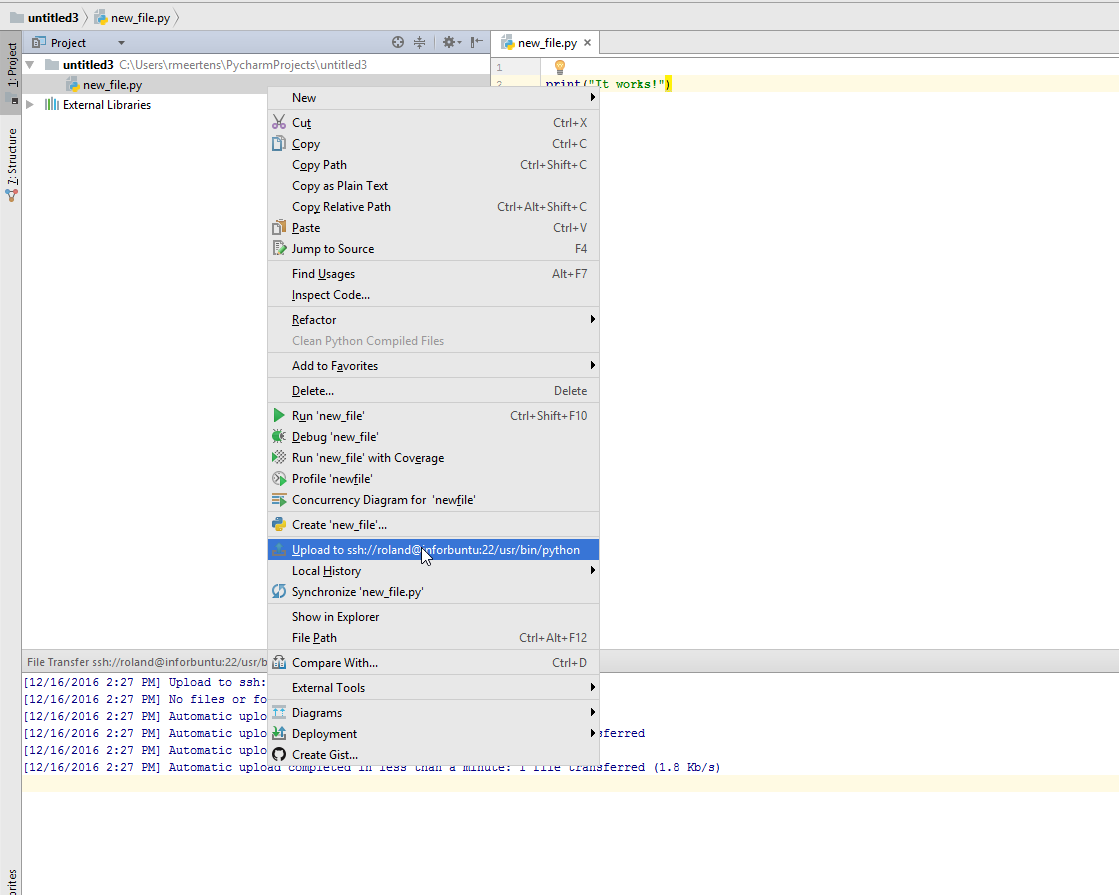
For me, when I added a new file, it automatically uploaded it to my remote pc. If Pycharm does not do this, make sure to right click on your project and select “Upload to …”.
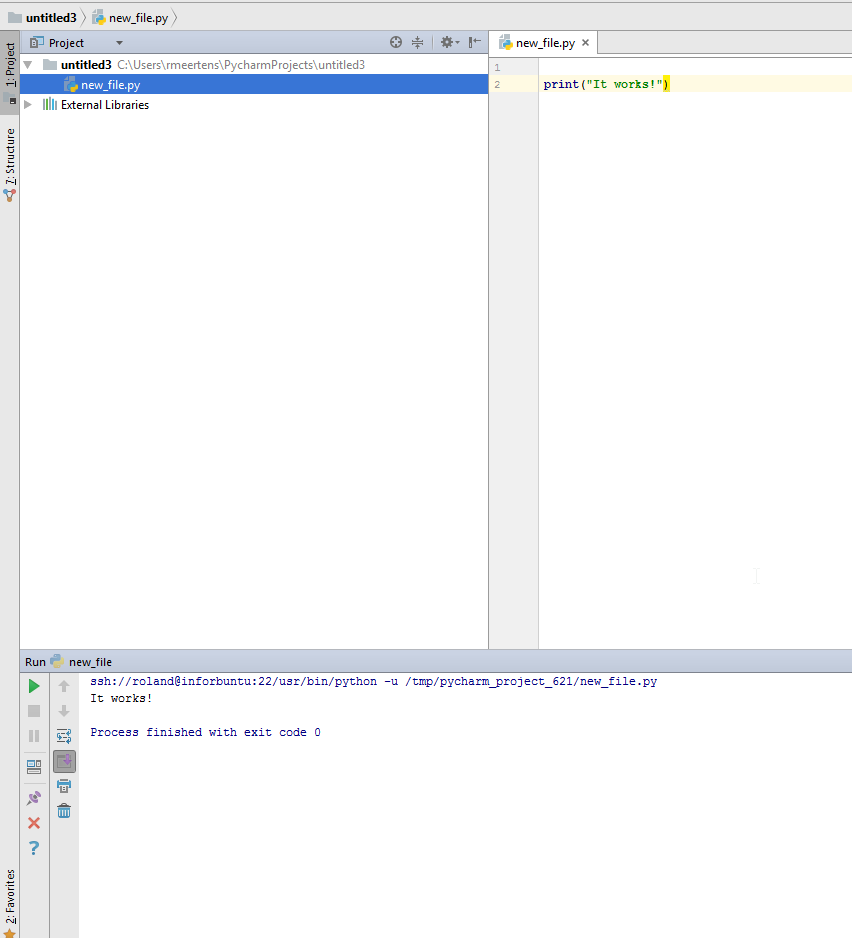
If you now create a simple program you should see that it runs remote! Good luck with setting up Pycharm, and let me know if this worked for you.
Facebook Comments (
G+ Comments (add)