“The more you buy, the more you save”. These are words NVIDIAs CEO Jensen Huang always utters at NVIDIAs GTC conference series. What he refers to is that in machine learning there are often many hyperparameters to optimize. Although a skilled machine learning engineer is able to select reasonable ones, there is often a lot of performance you can reach by trying out different parameters. The faster you can try out these parameter sets, the better, therefore, more GPUs means faster iterations and thus money saved (https://loupventures.com/nvidia-buy-more-gpus-save-more-money/).
Last weekend I wanted to try scaling some deep learning algorithms to see how fast I would be able to train imagenet. Over the last year training a 50-layer residual network on the imagenet dataset became a challenge, where IBM was able to train it in only 50 minutes( https://www.infoq.com/news/2017/09/ibm-scale-neural-network-gpus/). Sony beat this record a few months ago when they trained this network in only 224 seconds (https://www.infoq.com/news/2018/11/resnet-imagenet/).
Although these training speeds seem ridiculous, training your own hobby-networks quickly turns out to be quite in reach. Using Amazon’s AWS you can rent compute instances, where the best instance you can get gives you 8 very powerful NVIDIA Tesla V100 GPUS. To put this in comparison: most programmers are happy to run their deep learning algorithm on a NVIDIA 1080 GPU, with 0.355 64-bit tera-FLOPS (Floating Point Operations Per Second). A Tesla V100 has 7-7.8 64-bit TFLOPS (https://www.microway.com/knowledge-center-articles/comparison-of-nvidia-geforce-gpus-and-nvidia-tesla-gpus/). If scaling your training to this more powerful GPU does not give you the speedup you wanted, you can have 8 of them on one AWS instance, and you can also spin up multiple instances of these computers and train your network on all of them at the same time.
Training on an amazon-provided computer is easy, and Amazon already provided an excellent image you want to use: the deep learning AMI(https://aws.amazon.com/machine-learning/amis/). Their deep learning AMI guide has lots of interesting information and tutorials, and I recommend to check it out and read through the relevant parts: https://docs.amazonaws.cn/en_us/dlami/latest/devguide/dlami-dg.pdf. The pdf is quite big (251 pages), and that the tutorial “TensorFlow with Horovod” is the interesting one.
Horovod (https://github.com/horovod/horovod) is a framework produced by Uber which is able to scale deep learning over multiple computers. Horovod is also what was used to train imagenet with 256 GPUS in only 3 minutes.
https://aws.amazon.com/blogs/machine-learning/scalable-multi-node-training-with-tensorflow/
Tutorial
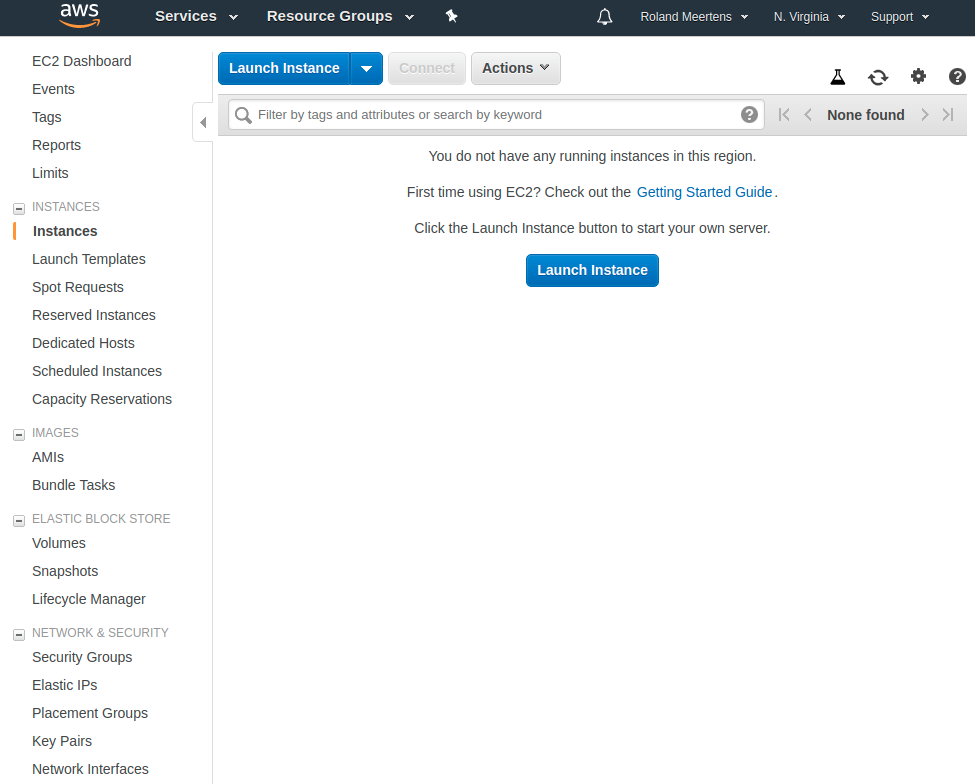
To start scaling your machine-learning algorithm across instances you first login to your AWS console (https://console.aws.amazon.com/ec2/home) and click the Lauch Instance button.
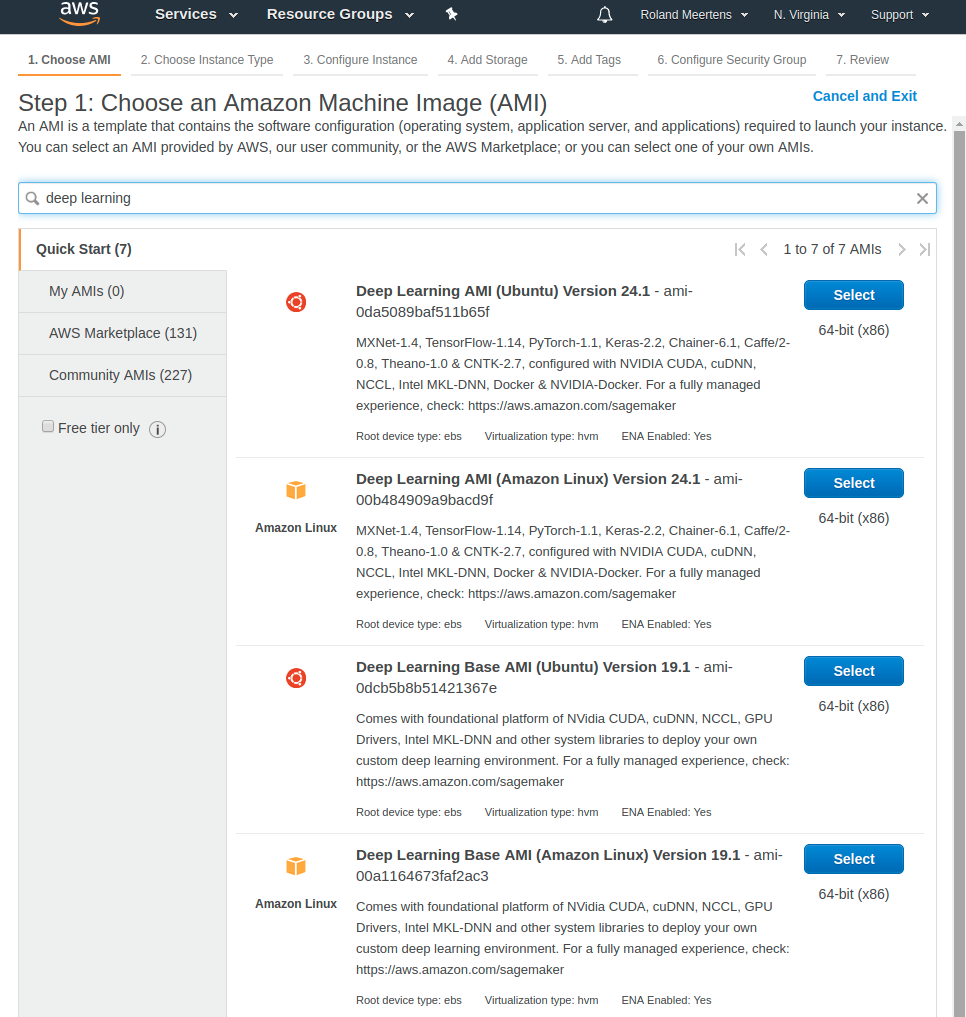
First you select the deep learning AMI I talked about before.
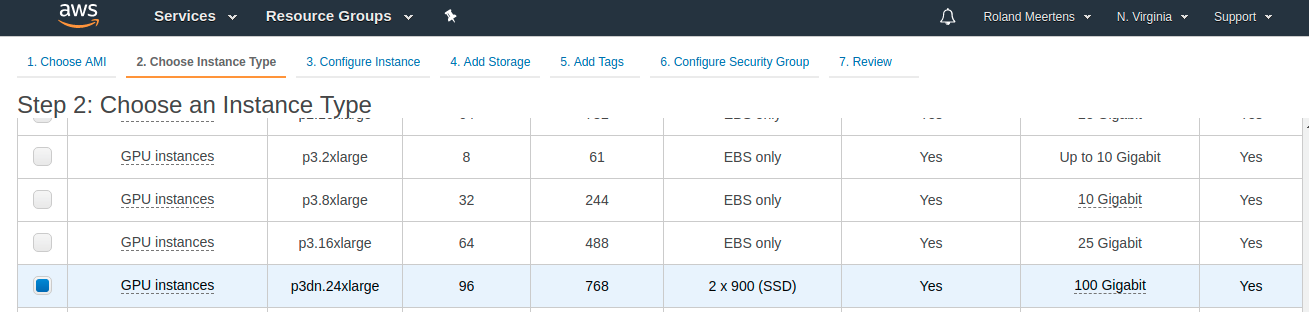
Next you can select the specific instance you want to have. You can find an overview of the GPU instances and their capabilities here: https://docs.aws.amazon.com/dlami/latest/devguide/gpu.html. Note that having more GPUS will speed up your training, but will also be more expensive. I recommend trying to start with one GPU and trying to fully use that one. Once you can do that try to fill 4-8 GPUs to their full capacity. Once you finished that you can move on to the final challenge: scale your training across multiple machines.
As a side-note: not every Amazon region has the same instances, and some regions have more compute available than others. If your preference is not available you can always go to another region. Make sure your data is in the same region though.
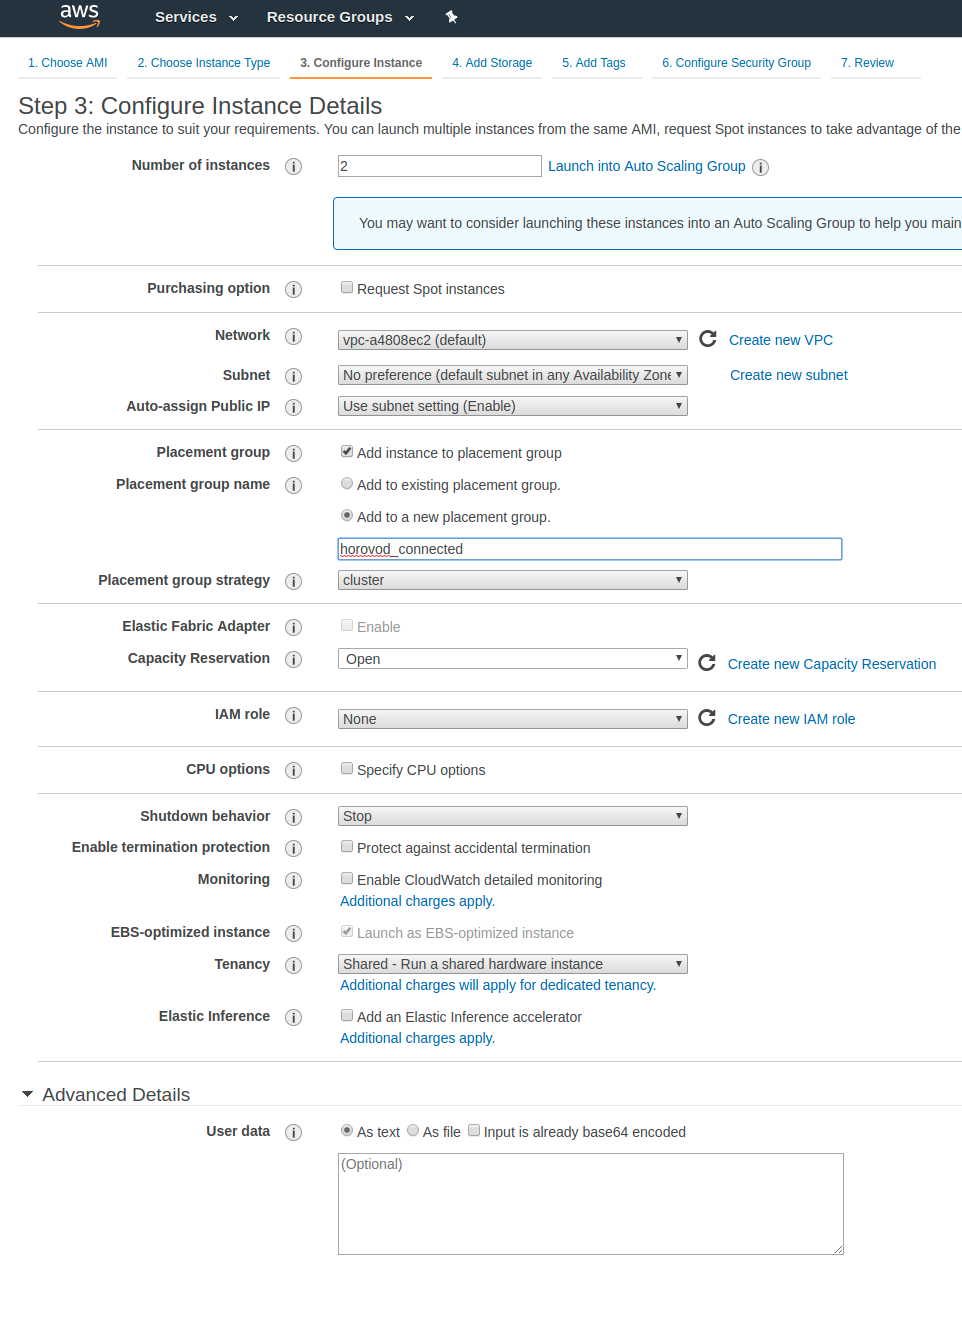
Next you can configure the instance details. I case you are interested in scaling your machine learning algorithm across multiple instances this is the moment where you can select how many instances, and where you have to add them to a placement group.
Next steps involve selecting how much storage you want on your instances, and tags you might want to add. This is purely dependent on how you want to use your instances.
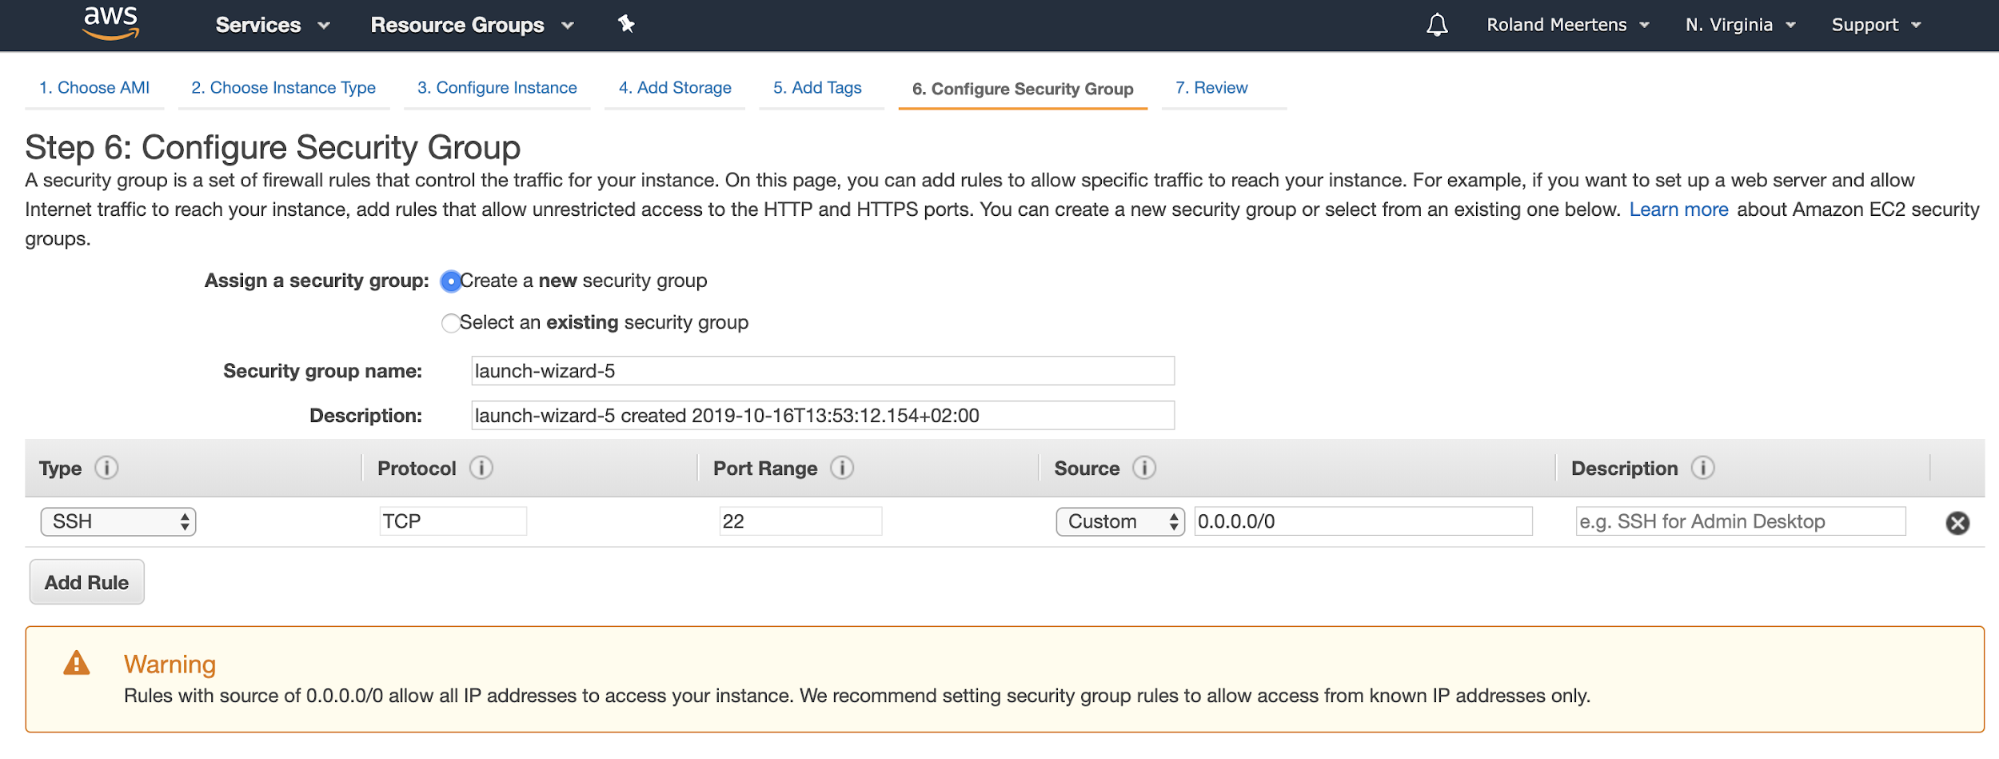
In terms of security group: what I found works is creating a new security group for them where you can choose from what sources SSH access is allowed.
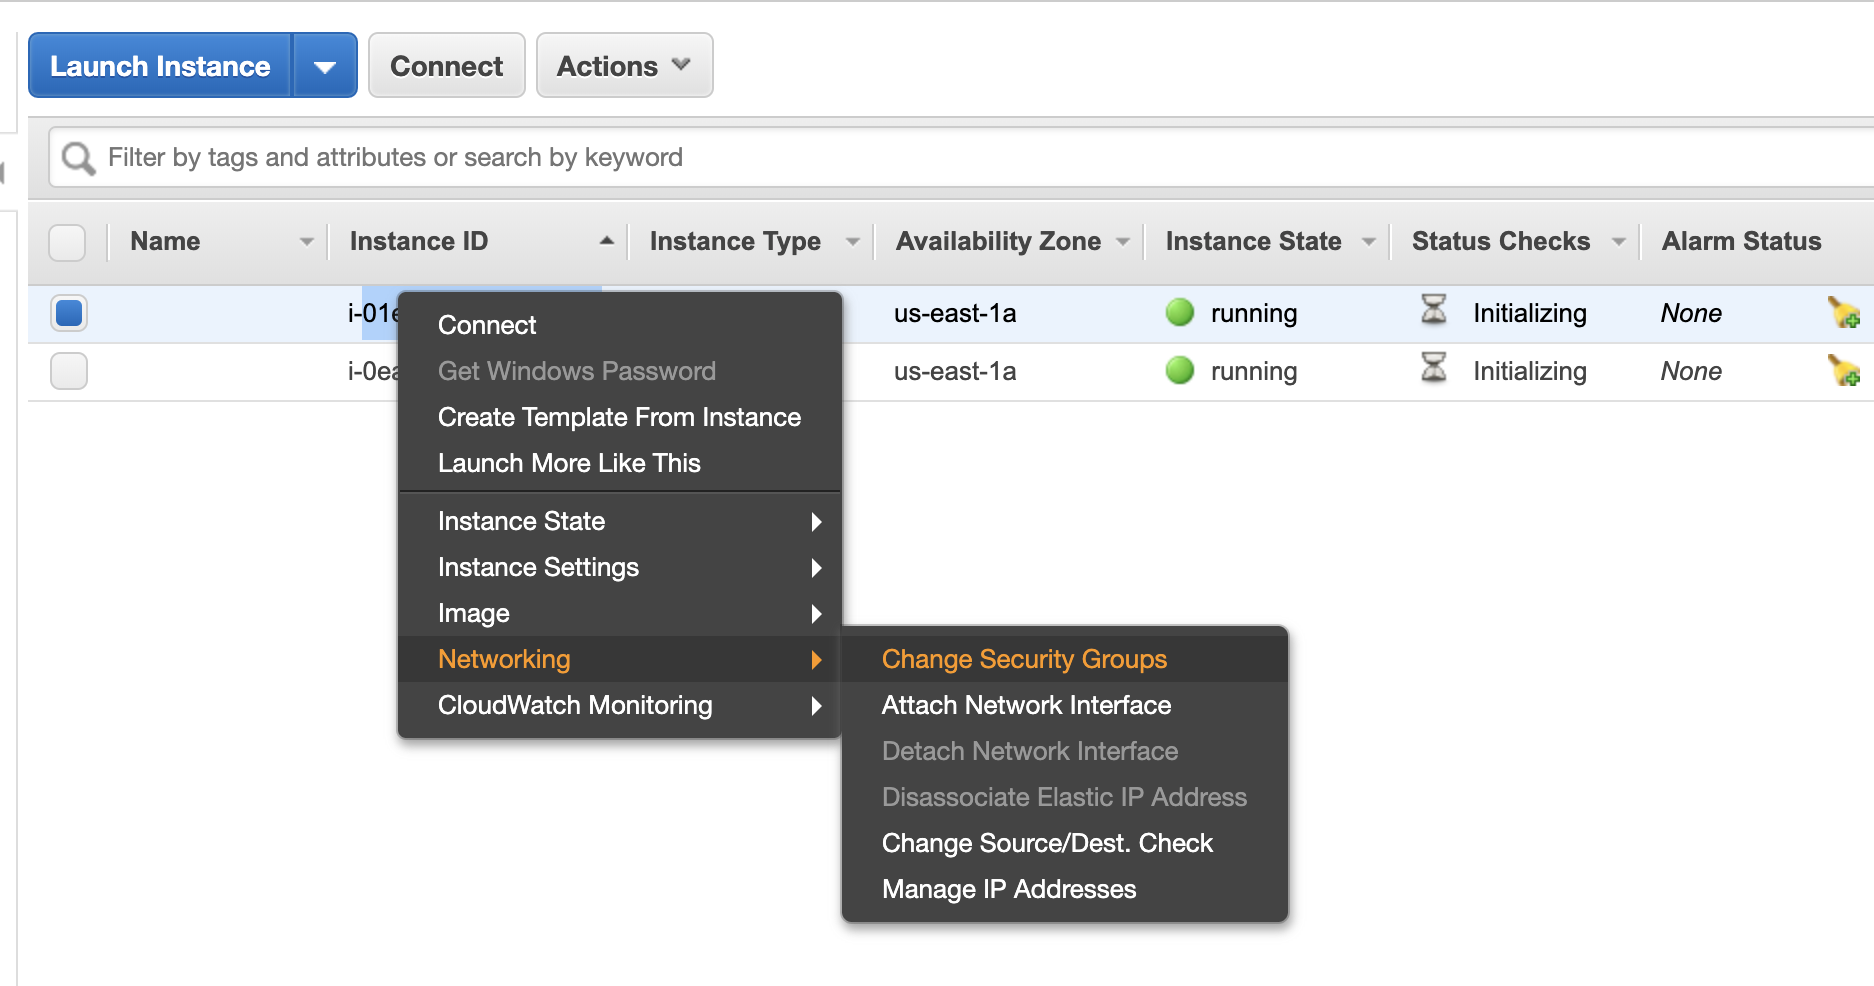
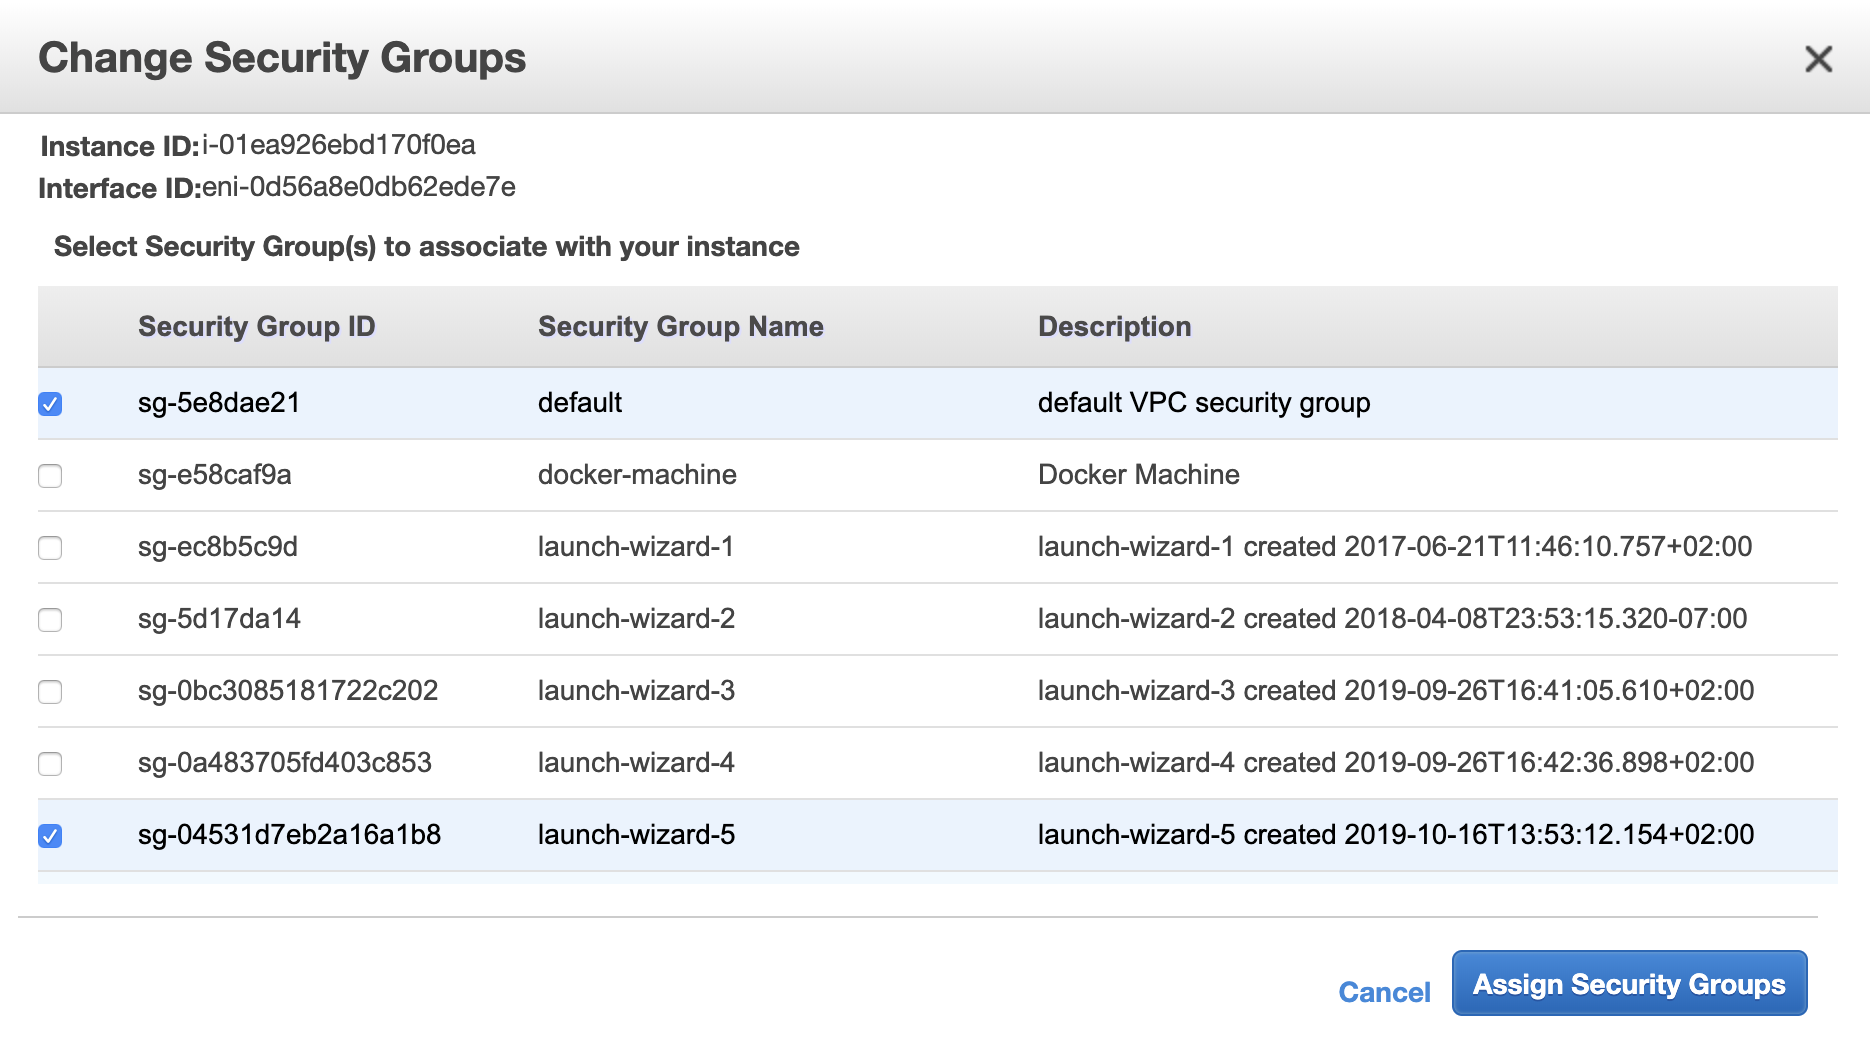
Launch your instances! Now that they are running it’s time to edit them directly. For horovod you apparently need more than only SSH-access. Select your instances one by one and add them to a security group which allows inbound traffic from all instances in the same security group. For me this was the default security group.
As a next step you have to make sure that your machines can connect to each other. I had to create two ssh keys on both machines using ssh-keygen, and add credentials to the machines. Note that I had to add not only the key of the other machine, but also my own public key to ~/.ssh/authorized_keys.
The steps to do this are as follows for the case where you have two AWS instances, which I will call machine_1 and machine_2:
On both machines run ssh-keygen. This will create the folder ~/.ssh which will contain the files authorized_keys, id_rsa.pub and id_rsa.
Copy-paste the contents of id_rsa.pub of machine_1 into:
~/.ssh/authorized_keys of machine_1
~/.ssh/authorized_keys of machine_2
Copy-paste the contents of id_rsa.pub of machine_2 into:
~/.ssh/authorized_keys of machine_1
~/.ssh/authorized_keys of machine_2
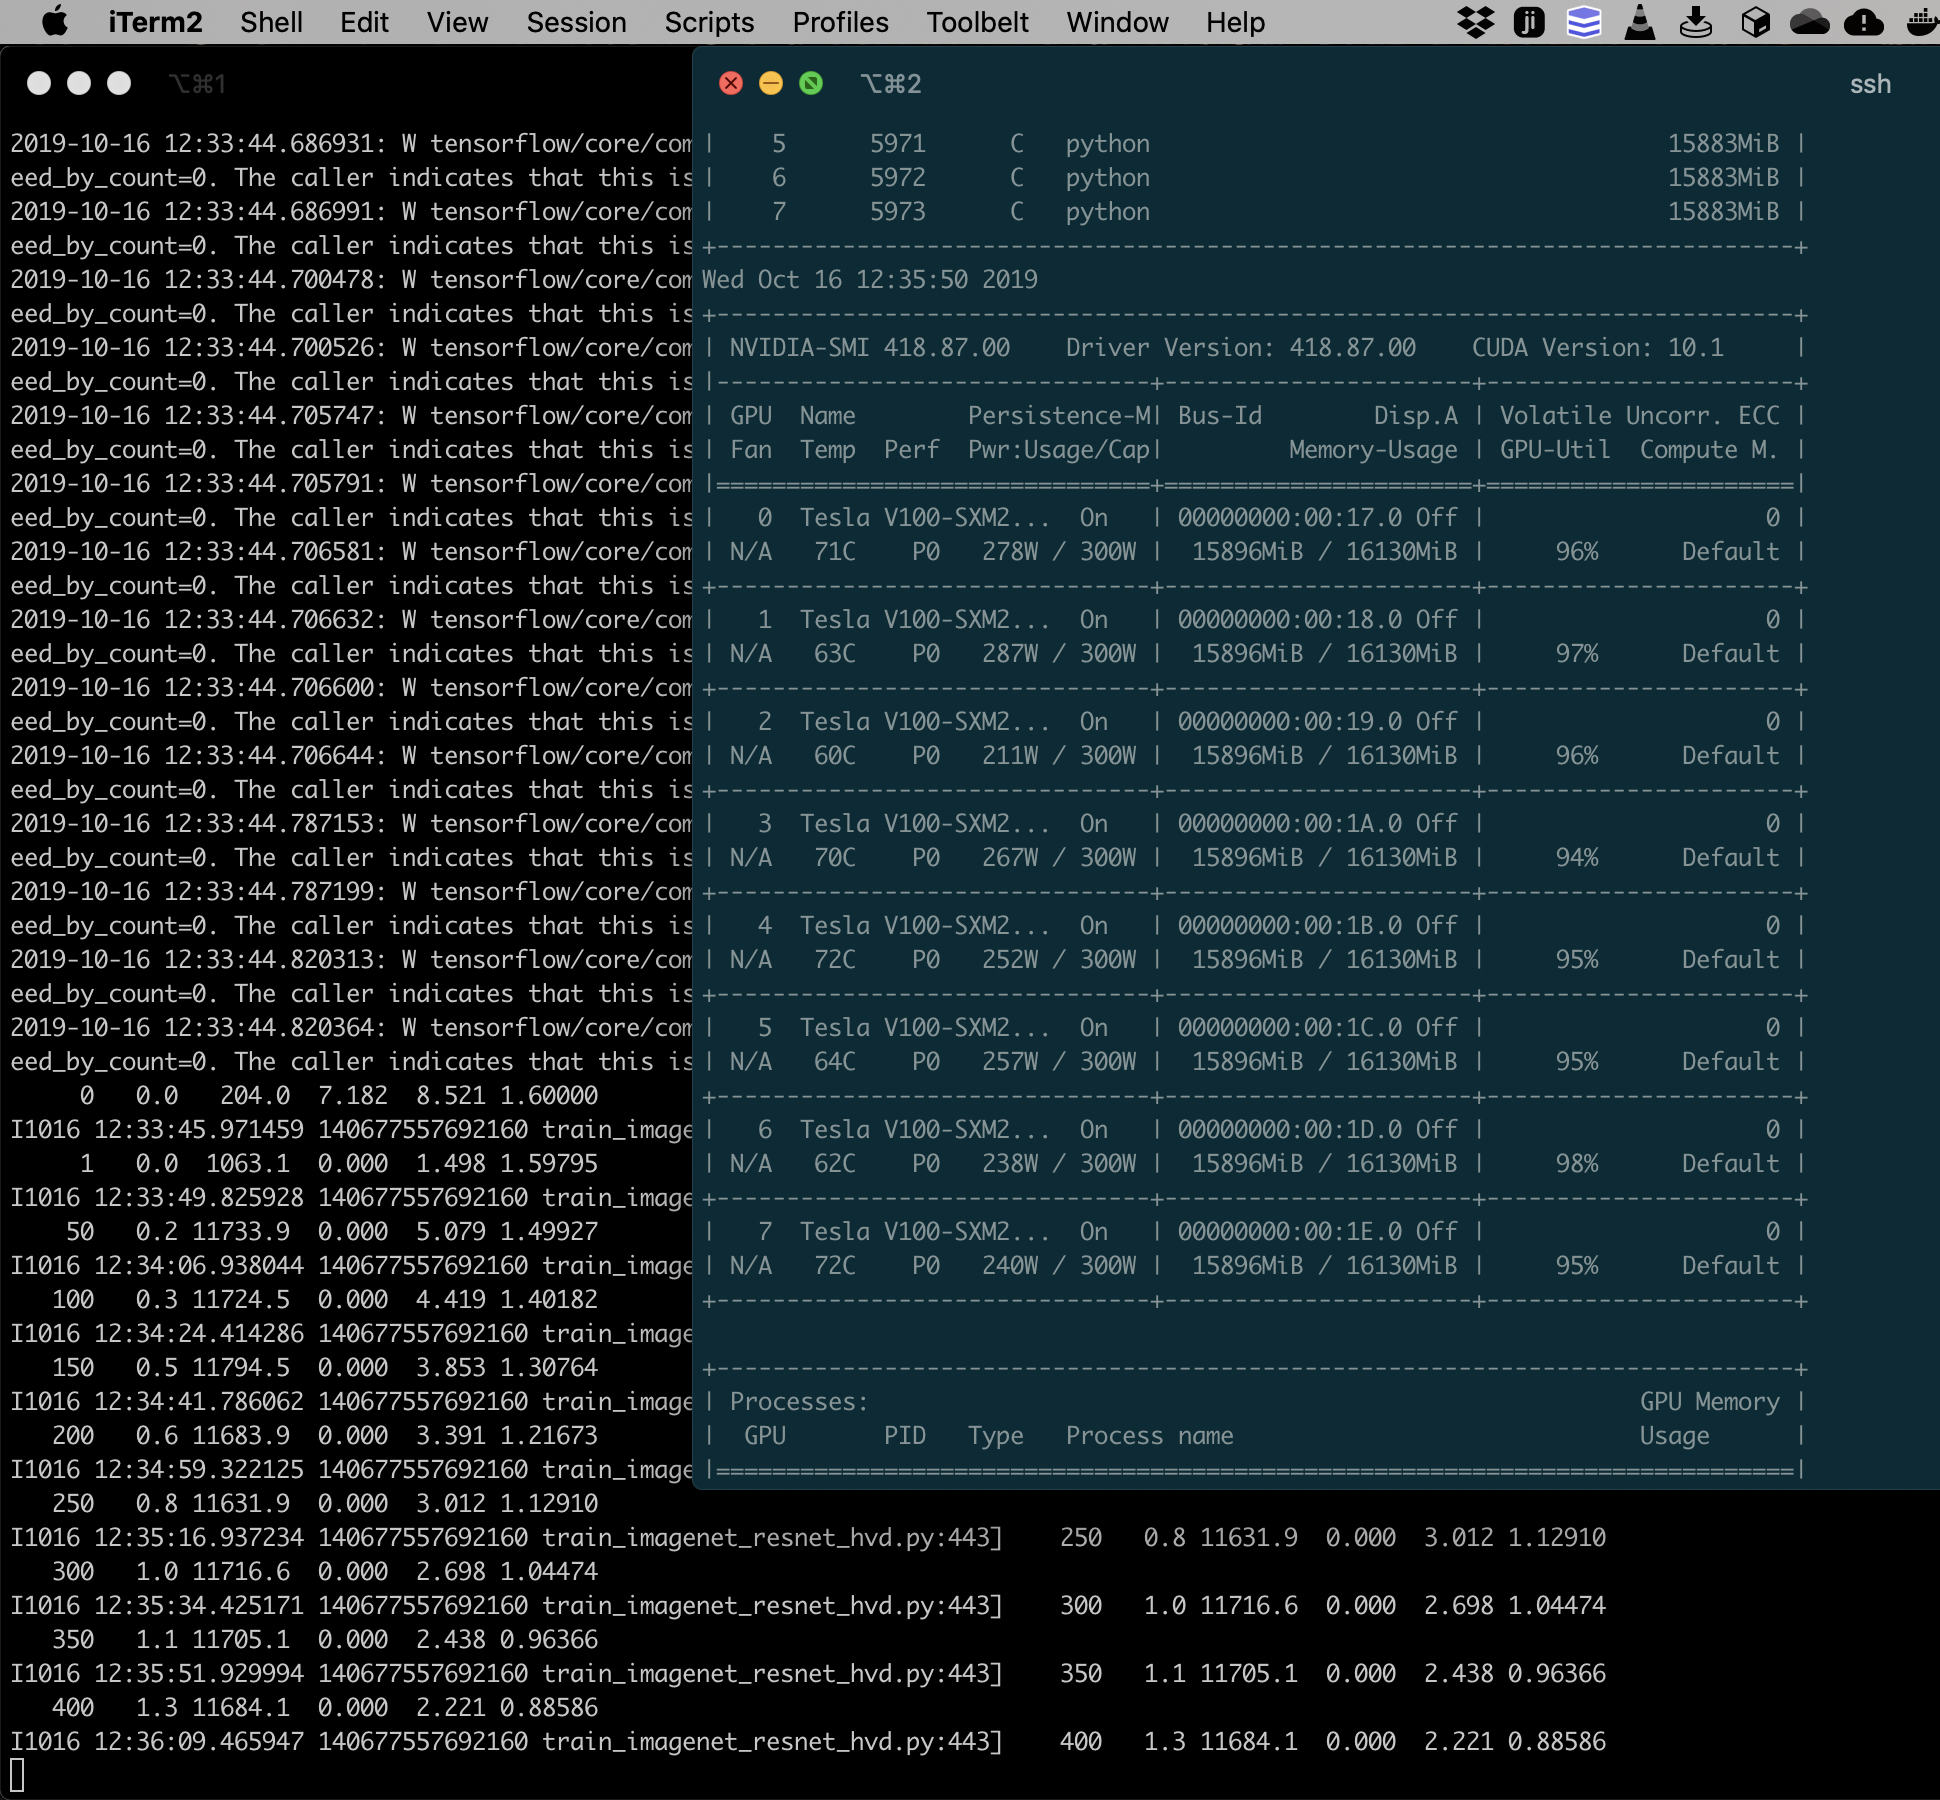
As last step you can test whether horovod now scales to two machines. You do this by on one machine (the master) going to the directory ~/examples/horovod/tensorflow. Here you edit the hosts file and add the private IP of the other machine. Then run ./train_synthetic.sh 16 to see if you can scale training imagenet to 16 GPUS.
If everything went well you should now see that you can train an imagenet neural network with synthetic data with 16 powerful GPUS with over 10.000 images per second, and that all GPUS are actively working!
Enjoy your new superpowers in training and experimenting with neural networks!
As a few side-notes:
- Make sure you are in the correct region! Amazon has different services and availability for computers in different regions. I had to make this tutorial two times because one time the instance I wanted to make was not available. Also make sure that your instances are in the same region as your data. You can have a fast ethernet connection, but that’s useless if your data has to go overseas.
- Turn off your amazon instances if you don’t use them! These computers are quite expensive, and although they are definitely worth it if you through this can accelerate your learning, they are not worth it if you don’t stop them when your training is done.
- Create instances with enough disk space. You can choose the disk space at the start, and I noticed I quickly needed more disk space than I got when I launched. This is mostly due to quickly pulling in extra interesting data or dependencies because of your faster testing.
- It looks like there is an issue with the TensorBoard callback (https://github.com/tensorflow/tensorflow/issues/31451). This makes it less useful to perform many experiments…